Harbor私有镜像仓库搭建
harbor官方github地址:https://github.com/goharbor/harbor
我这边已经下载离线包:harbor-offline-installer-v2.0.6.tgz
1、将 harbor 包放在 opt 目录下
1 | cp harbor-offline-installer-v2.0.6.tgz /opt/ |
2、解压 harbor 包
1 | tar vxf harbor-offline-installer-v2.0.6.tgz |
3、harbor 目录改名
1 | mv harbor harbor-2.0.6 |
4、创建 harbor 软链接
1 | ln -s /opt/harbor-2.0.6/ /opt/harbor |
注:在生产上一般用软连接去管理不同版本的软件包,这是个非常常用的方式
5、复制配置文件 harbor.yml
1 | cp harbor.yml.tmpl harbor.yml |
6、编辑 harbor.yml 配置文件
1 | hostname: harbor.example.com |

注:这边使用的是 180 端口,由于后期要用 nginx 反代。
7、创建安装目录
1 | mkdir /data/harbor/logs -p |
8、安装docker-compose
1 | yum install docker-compose -y |
注:由于harbor本身是一个单机编排的软件,所以它依赖docker-compose
9、执行harbor的install.sh安装脚本
1 | ./install.sh |
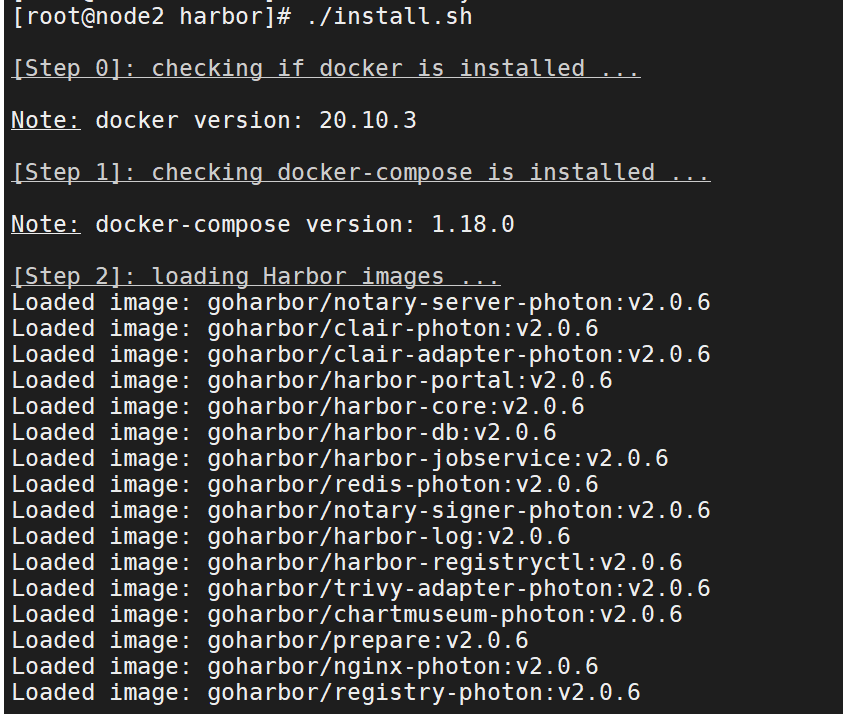
注:这边你可以看到harbor依赖的软件包
10、docker ps查看

11、安装nginx
1 | yum install nginx -y |
12、配置nginx配置文件/etc/nginx/conf.d/harbor.example.com.conf
1 | server { |
13、启动nginx
1 | systemctl start nginxsystemctl enable nginx |
14、配置DNS服务器,将harbor业务域加入进去(若本地不配置DNS服务,则跳过此步骤)
1 | vim /var/named/example.com.zone |
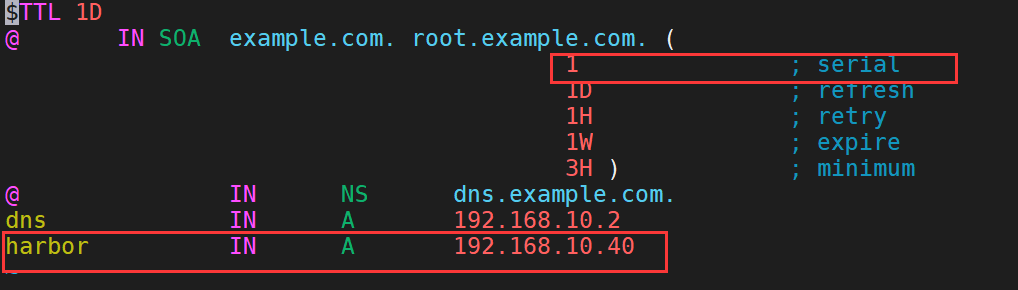
注:example.com.zone为我这边环境的业务域,要手动serial前滚一个序号!!!!
15、重启DNS服务器(若本地不配置DNS服务,则跳过此步骤)
1 | systemctl restart named |
16、用浏览器打开harbor.example.com (打开网站的主机要配置对应的DNS服务器)
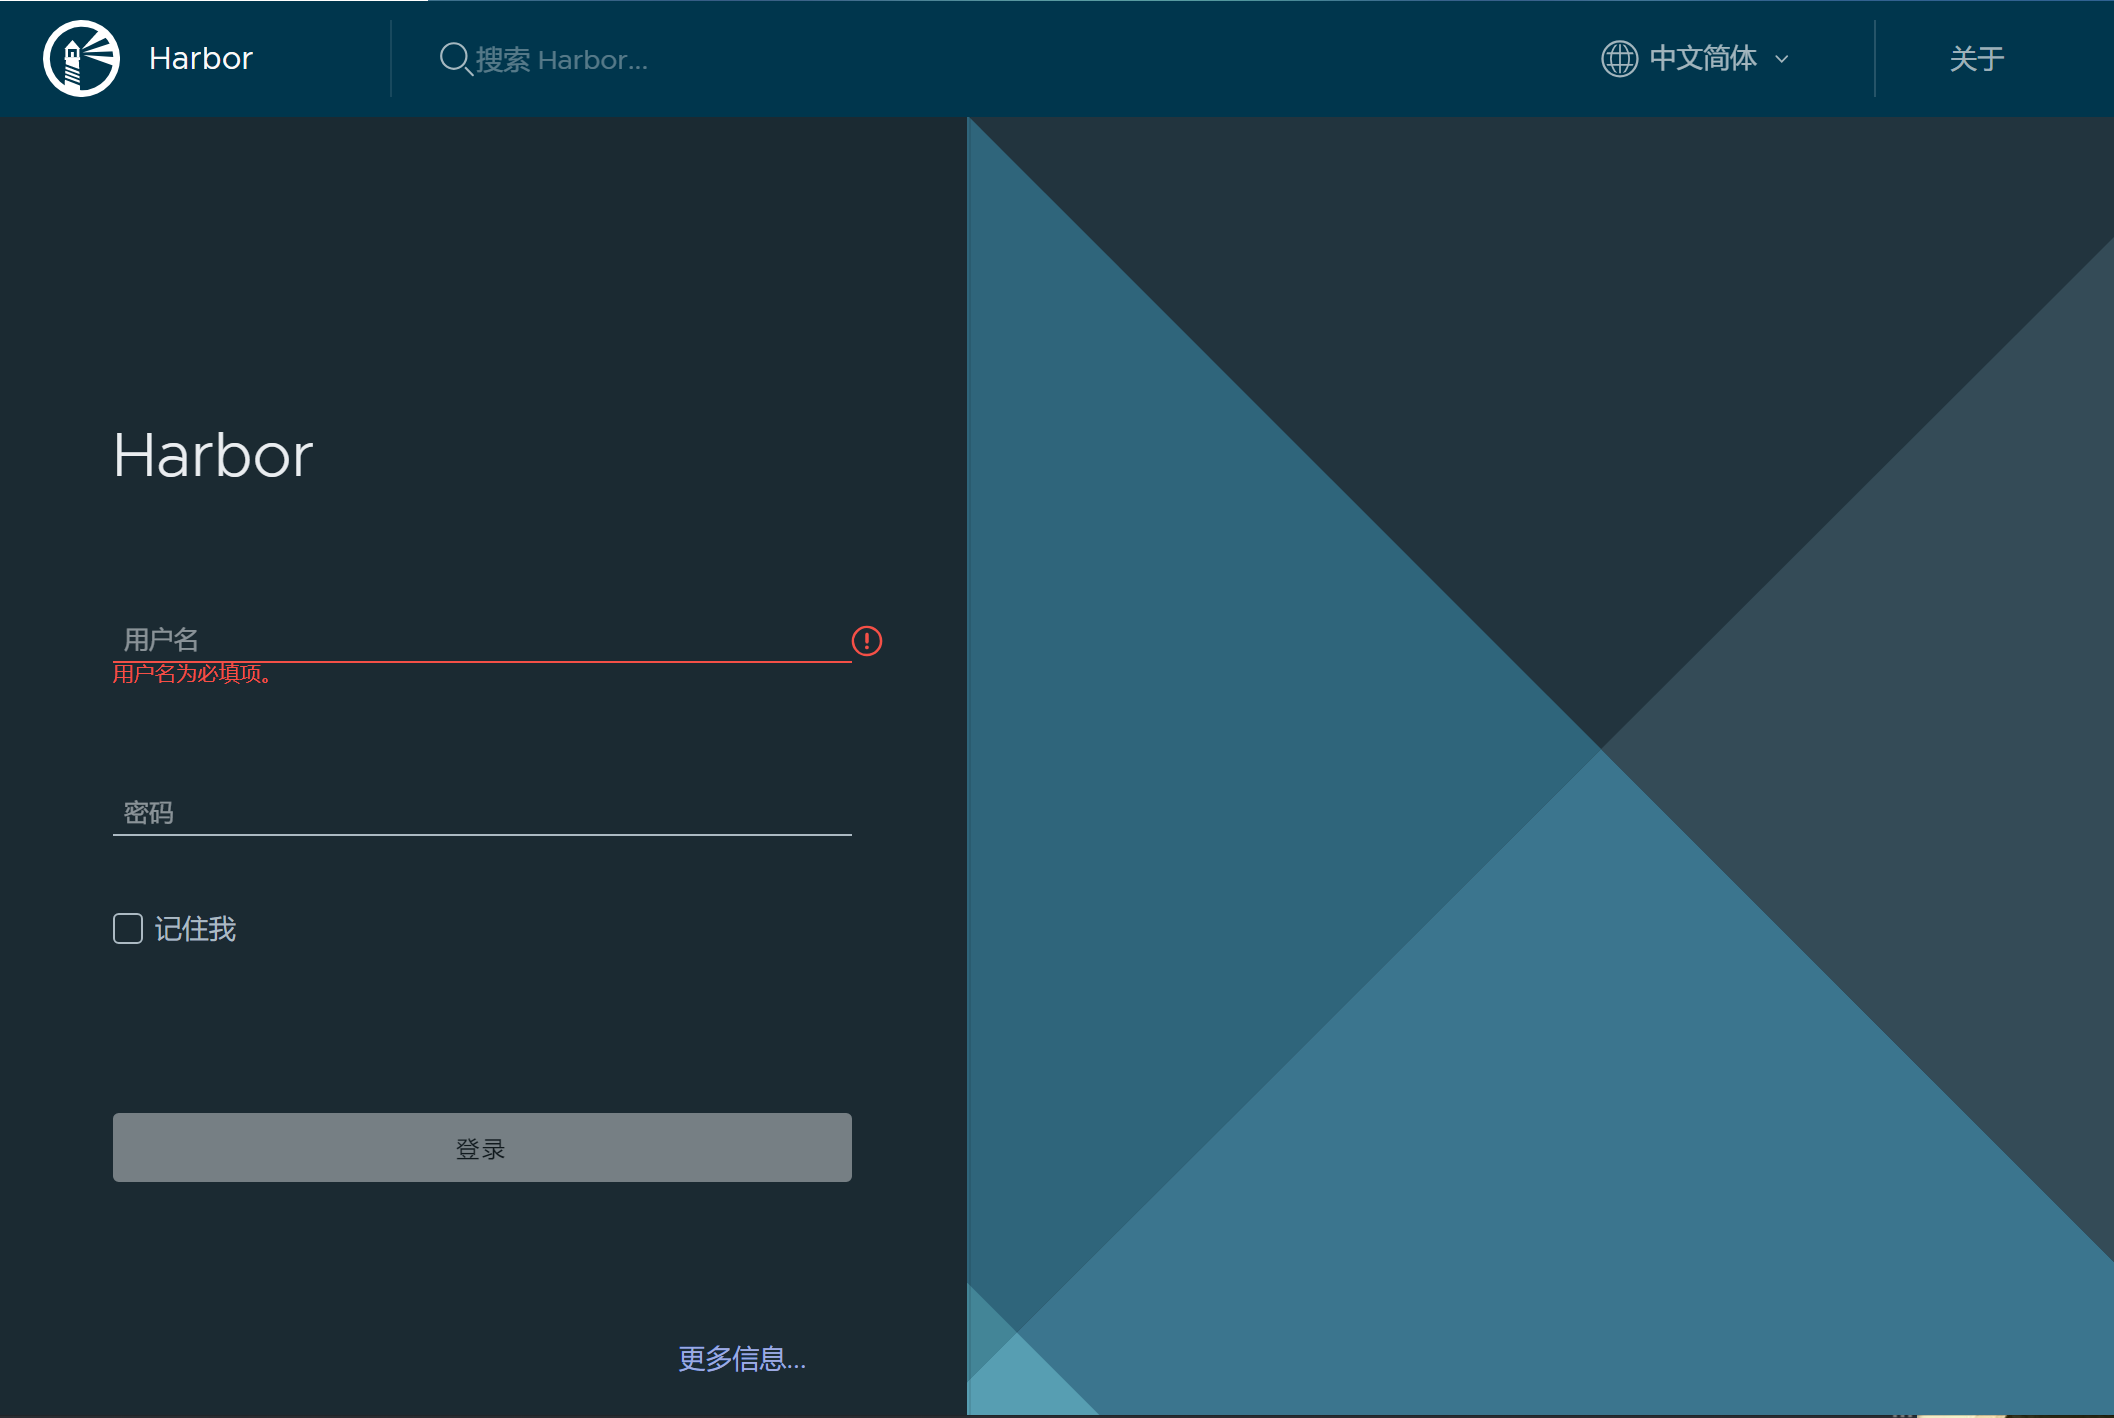
账号为:admin,密码:Harbor12345
密码为之前安装时的harbor.yml配置文件配置的密码。
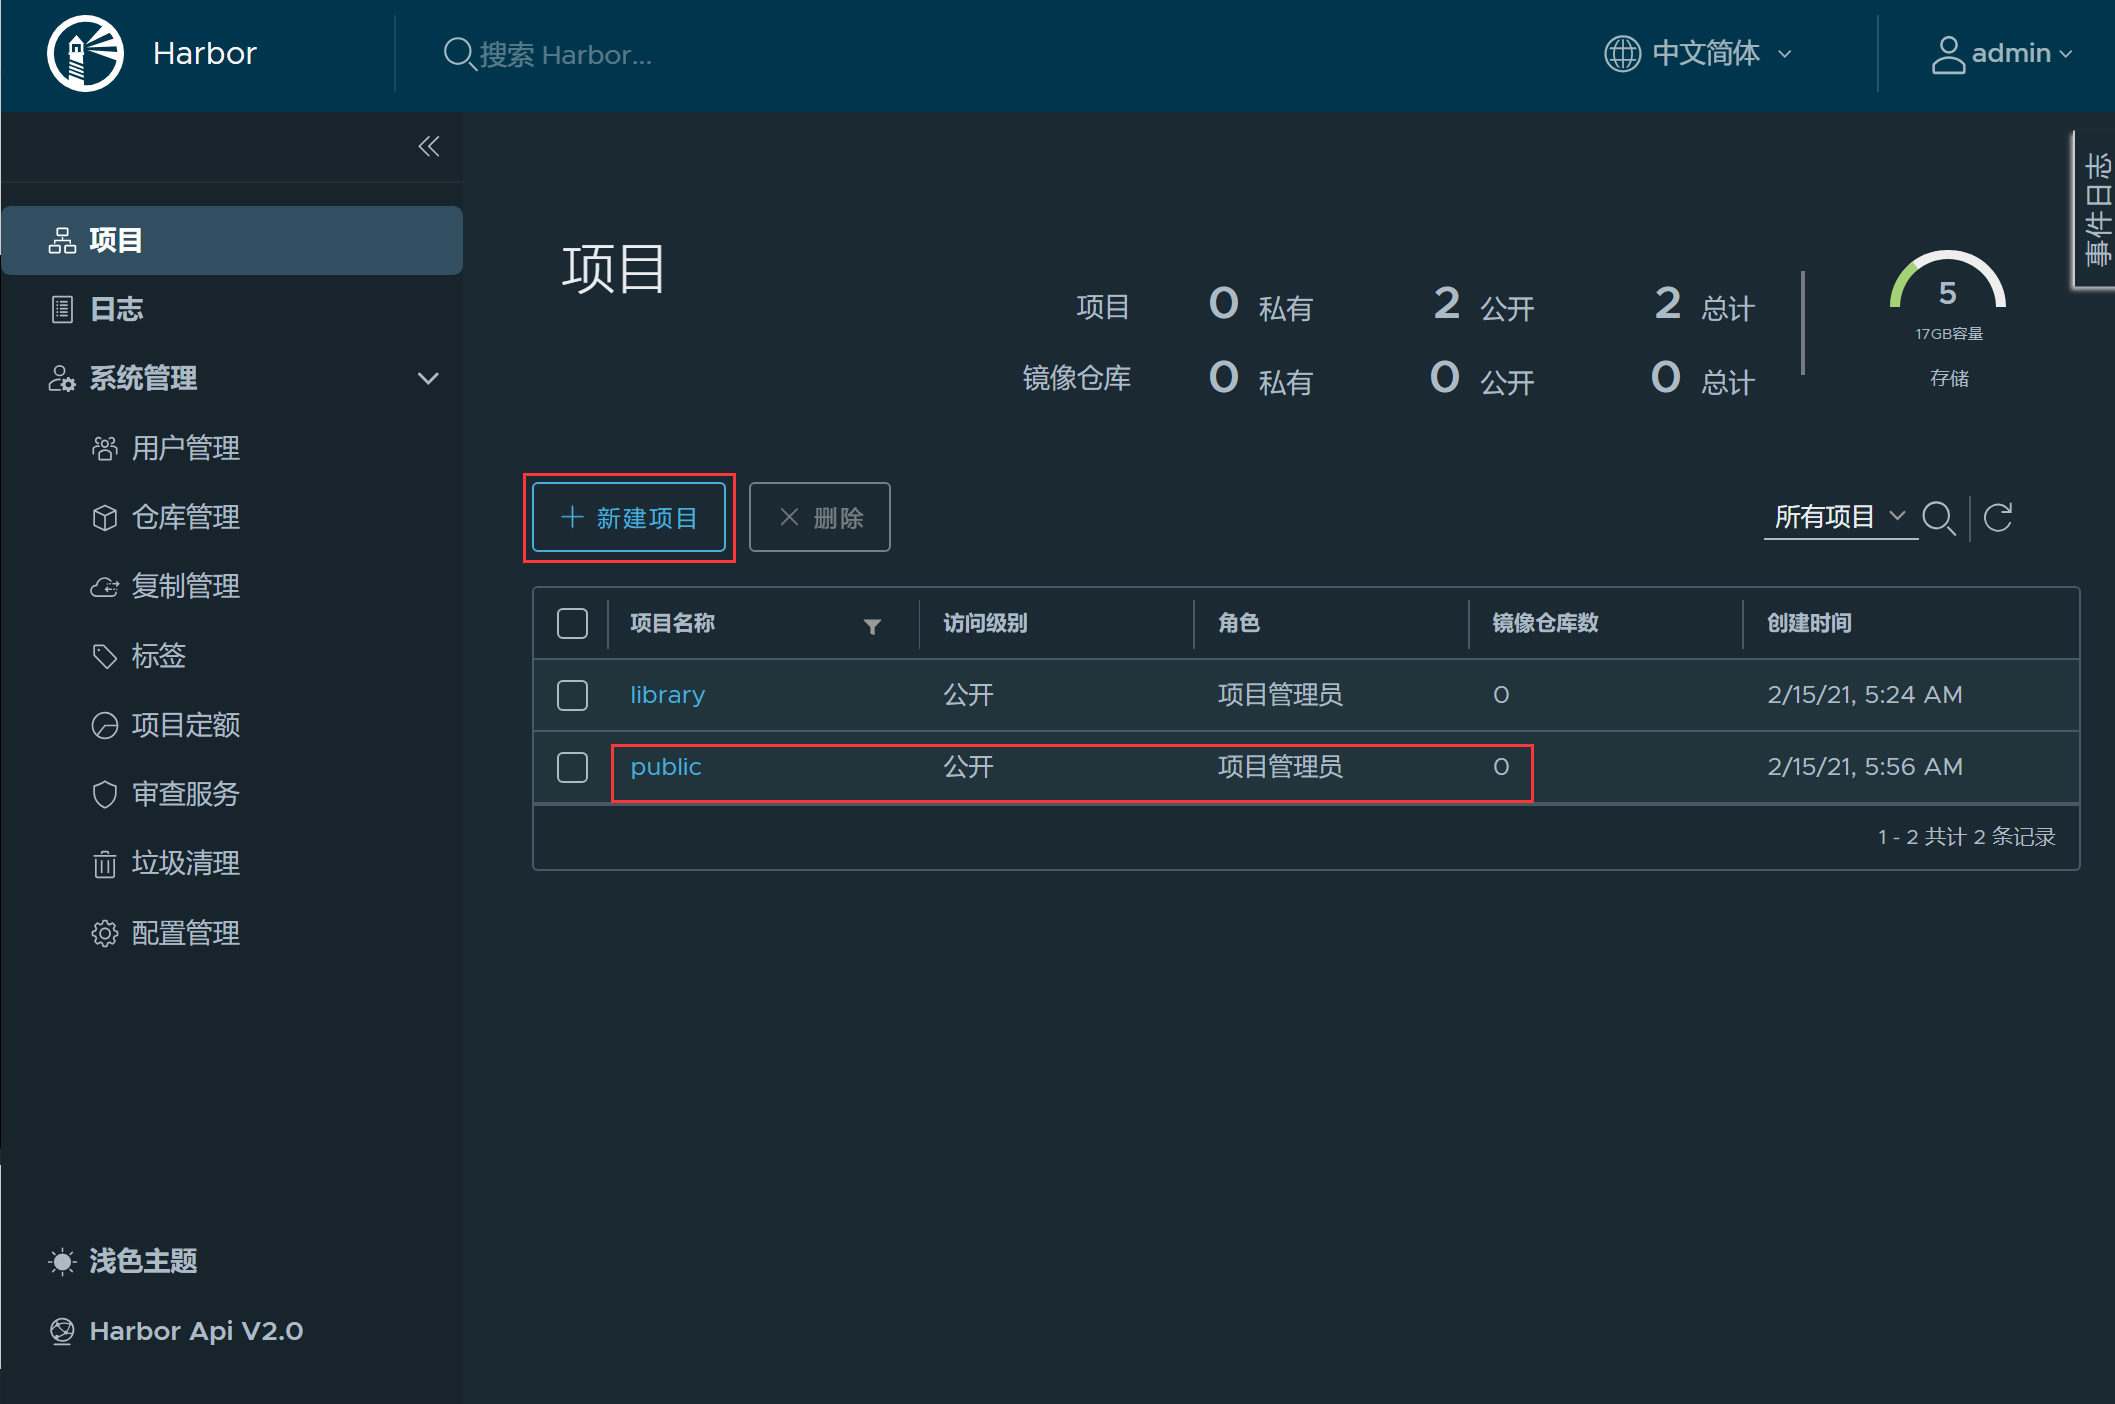
17、创建一个public项目
18、pull一个nginx镜像
1 | docker pull nginx |
19、给这个镜像打标签
1 | docker tag f6d0b4767a6c harbor.example.com/public/nginx:latest |
20、docker login登录harbor私有仓库
1 | docker login harbor.example.com |

21、将之前打标签的镜像传到私有仓库上
1 | docker push harbor.example.com/public/nginx |

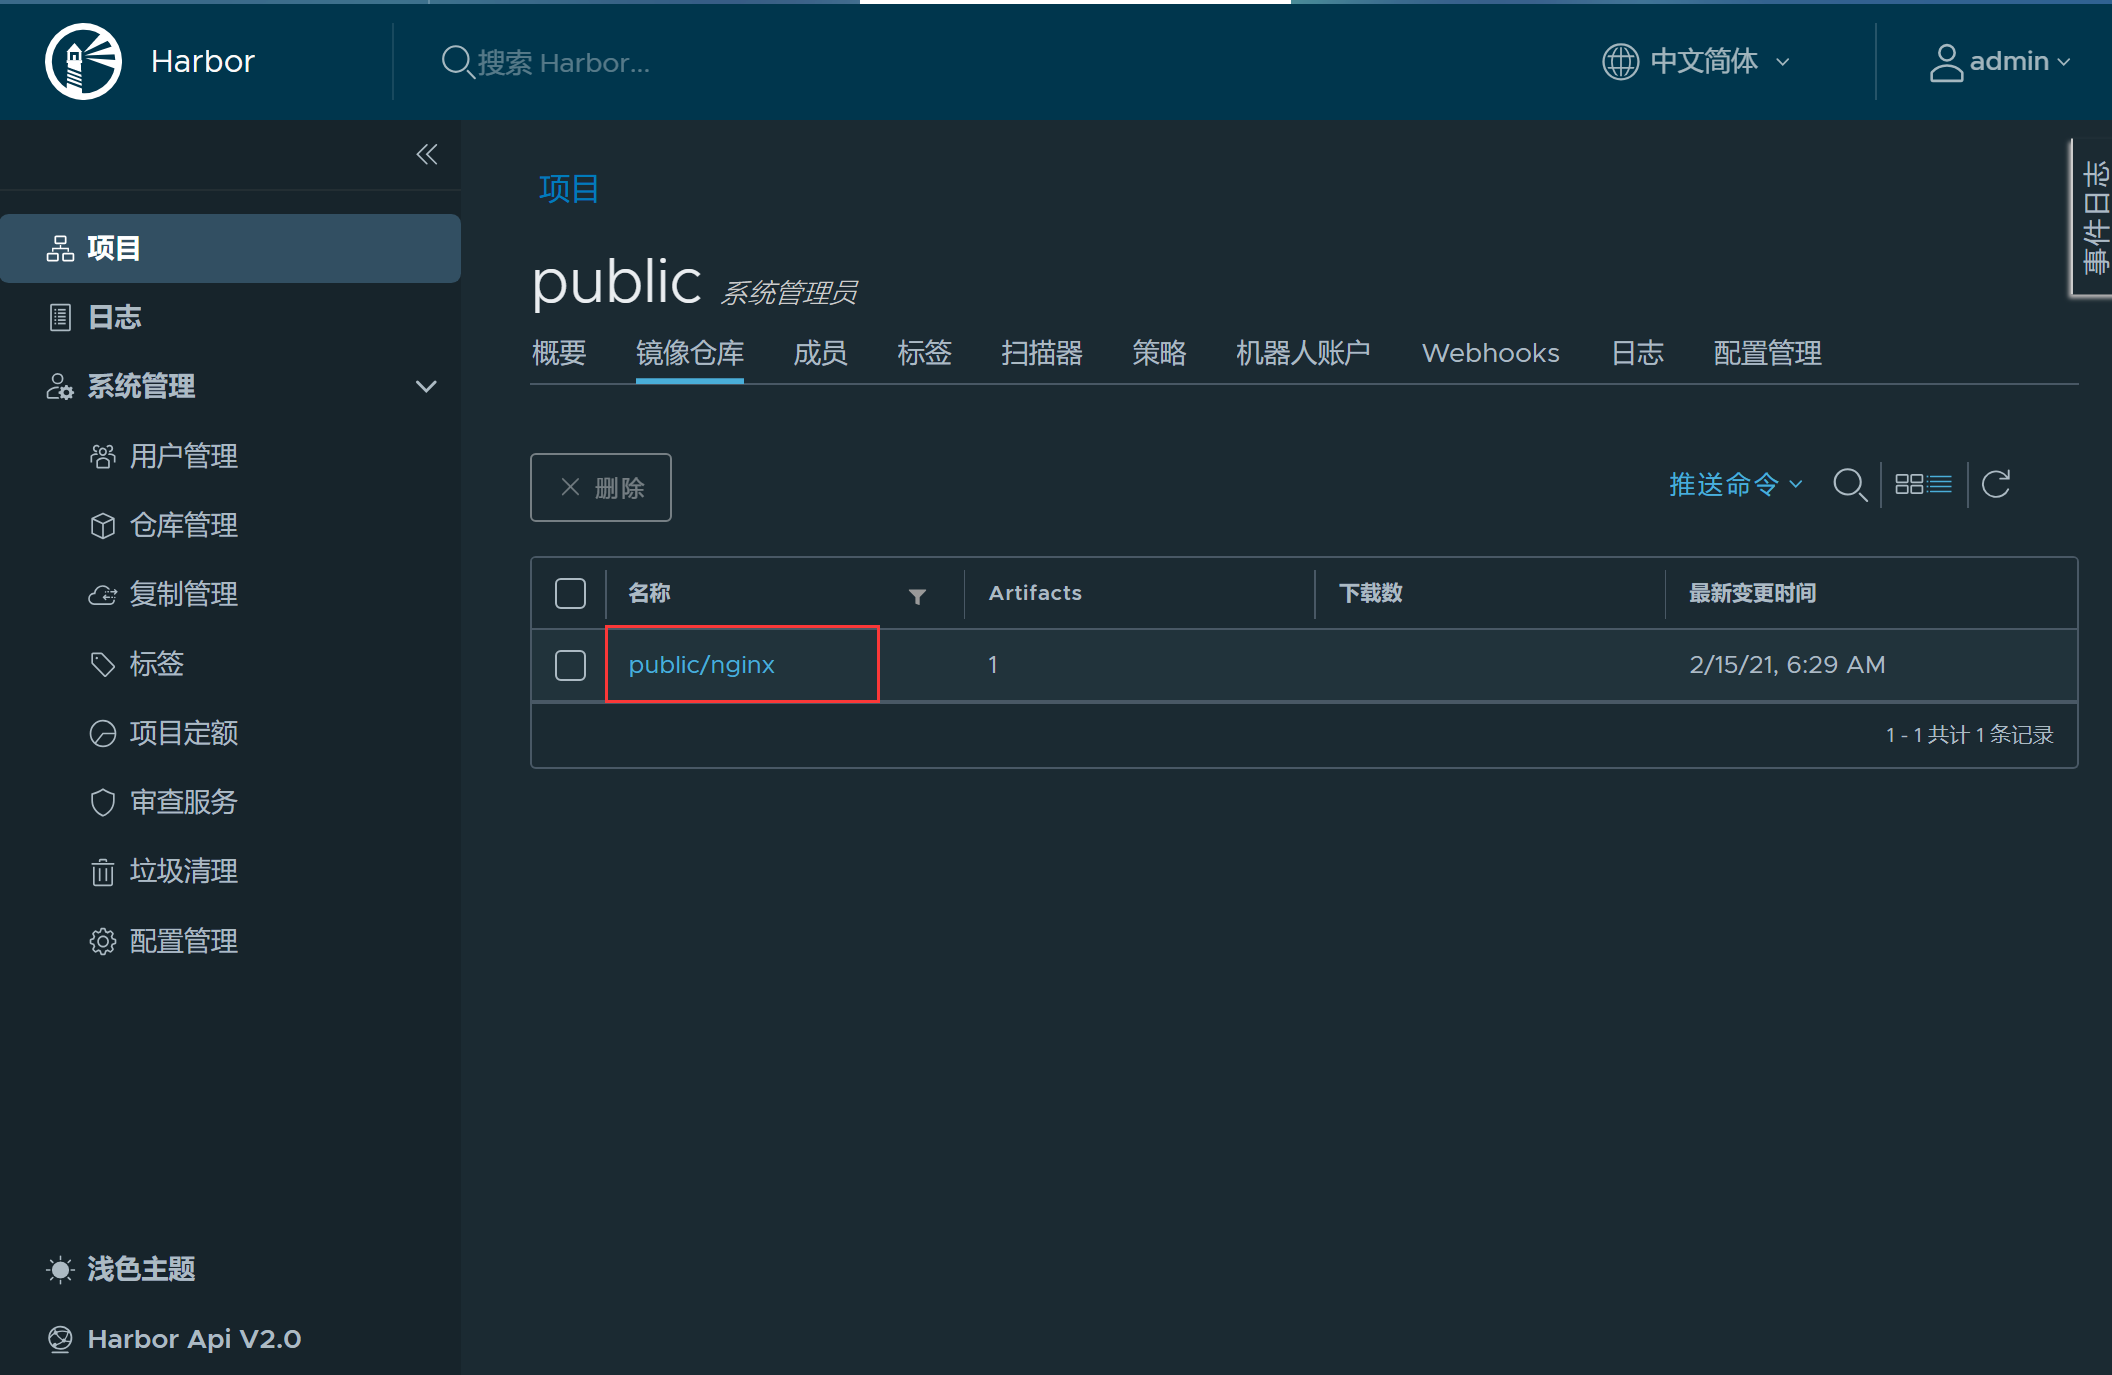
22、在web端查看,确认是否已经上传
23、重启服务时要注意细节
1、确认时间是否正确
2、先启动 docker 服务
3、等待 docker 将所有 harbor 所需的容器启动起来,若有没有启动成功的容器手动将其拉起来。harbor 的各个容器之间是有依赖的,某些容器会依赖部分容器。
4、当所有的容器都正常启动后,再启动 nginx 进行反向代理。